Roland CII WIP Pt.3
It's been quite a while since I was able to sit down and continue making my Eduard 1/48th Roland CII. In fact it was last September when I did anything with it. The main reason for this was that I was researching airbrushes in order to paint the fuselage. I ended up buying a Badger airbrush with a compressor off EBay, I had also bought some RLM 76 Light Blue paint from Mr Hobby as I wanted the paint scheme to be the classic whale fuselage as seen on the box art.

I tried the paint with the airbrush. It didn't spray. So then I decided to track down some thinner to mix in the paint as I though the paint was too thick. It still wouldn't spray. I tried the airbrush with just water and it still wouldn't spray. So, I changed tack; I started painting the Mr Hobby paint on with a brush. This is when I realised the limitations of the paint. Not only was it incredibly thin, but the second coat reactivated the original coat and started dragging it off the plastic! I was at the stage of binning the entire model, but I thought I'd give it one more chance. I bought some Humbrol Light Blue instead. Bam! It was perfect! The Humbrol pigment was much thicker and stuck to the plastic much better. The actual painting was done pretty quickly, and two coats were enough:

The next stage was to add all the little bits and pieces to the fuselage and wings, there was very little left to do to the main part of the aircraft.

The top wings went on with no problems. The good thing about the CII is that it's a pretty robust aircraft due to the level of the top wings and the fuselage.

The plane was then set aside while got down to the fiddly work of making the machine guns. These are made from the original plastic ones with many photo-etched parts added, they took about an hour to build up, but look much better than the original versions.

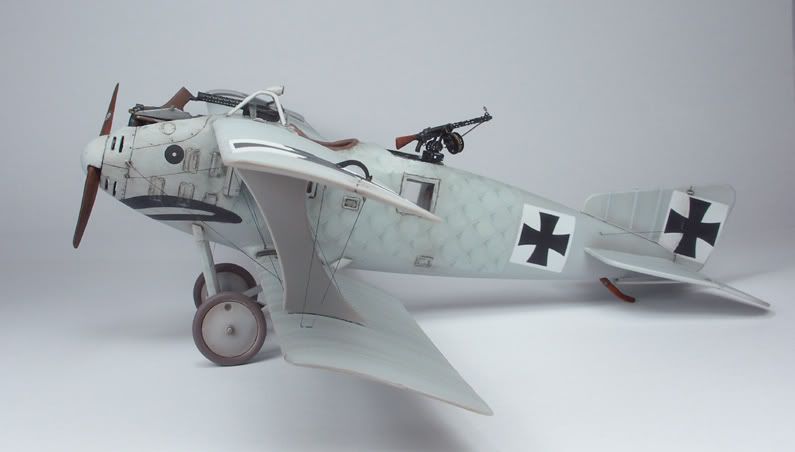
There was little left to do with the machine-guns except paint them and fix them in place, but before that part started I went back to the body of the plane and applied the decals. I realised that I had glued on a few bits and pieces that would sit over the top of the decals; the air intakes on the fuselage and some tiny pieces on the tailplane, for example, so these had to be removed and would be added later. It was slightly annoying to realise this, also realising that it would have made my life easier had I left the top wings off while I applied the fish scale decals... But, despite all this I applied the decals:


The application of the decals was really helped mainly due to the use of Microsol, a chemical which softens the decals so they conform to the shape of whatever it is being applied to. This was invaluable as there is some detail on the fuselage that is covered by the large fish scale decals and the Microsol helped to bring those details back out!
This is as far as I am now, there is still quite a lot left to do on the model, but it's not far off completion! Thanks for looking!

Comments
Post a Comment